Architects and engineers are always under the gun to provide projects that are high quality, constructed within a tight time deadline and cost effective or in simpler terms, “Good, Fast and Cheap”. In the real world, you can usually get 2 out of 3 as long as you understand the ramifications of not having all three. For instance, a project can be Good and Fast, but it will not be Cheap or it can be Fast and Cheap, but it will not be Good and finally it can be Cheap and Good, but it will not be Fast. Getting all three is a challenge to all of us in the construction industry. Specifically within the engineering sector, most of the critical engineering decisions that impact the “Good-Fast-Cheap” scenario are decided before an engineer actually gets involved (preliminary design states). This is due to the design parameters of the project such as form, function and space, control more than the structural parameters. Consequently, the engineer gets involved after the design requirements are determined and the engineer is left trying to salvage the project and find out which 2 out of the 3 “Good-Fast-Cheap” items they want to obtain.
To cut the gap between these categories Value Engineering needs to be implemented in the up front design procedures. The magic key to this is “Value Engineering”. Value engineering, in simple terms, is the ability to use ones experience and knowledge to minimize costs while not sacrificing the structural integrity of the system. Although this is an “engineering” function, it does not have to always involve an engineer. Successful “Value” engineering can be and is more often performed by Estimators, Technicians, Designers and Project Managers. Therefore, the more tools that are available to the designers up front will help close that gap and also help the designers make “on-the-spot” decisions regarding structural/architectural relationships. The following Engineering Rules of Thumb are intended to provide design assistance in the preliminary stages to both homeowner as well as designers to achieve the quality, costs and time frames required.
Foundation Design Rule of Thumb:
There are numerous factors that affect foundation designs including loads on the structure, soil characteristics, performance criteria and costs. Of these, the soil characteristics play a major role in the final decision making regarding the type of foundation system that can be used and the costs associated. In general, the more active or expansive the soils are then the overall costs of the foundation will be higher. The following chart is not based upon scientific analysis but years of experience has created this “Rule of Thumb” and is quite helpful.
| Foundation Type | Potential Vertical Rise (PVR) | Plasticity Index (PI) |
| Slabs-On-Grade (SOG) | 1″ to 4.5″ | 15 to 55 |
| Slab-On-Grade With Water Injection or Modified Soils | 5″ to 7″ | 55 to 65 |
| Suspended Slabs 5″ to 7″ | 5” to 7” | 65 to 75 |
| Pier and Beam | Greater than 7″ | 75 or Greater |
PVR or Potential Vertical Rise is how much the soil is anticipated to swell when the soils go from a dry state to a wet (or saturated) state. The amount of movement is highly dependent on the type of soil and depth of varying soil layers. This is a laboratory test. Actual PVR will depend on actual moisture content in the soil at the time of construction.
PI or Plasticity Index is a measure of the plasticity of a soil. It helps identify the expansiveness of the soils. Soils with a high PI tend to be clay and are more expansive while those with a lower PI tend to be silt and less expansive.
Framing Design Rule of Thumb
As a Rule of Thumb, it is usually more cost effective to use deeper framing members rather than using wider members or even adding more quantity within a framing system. The reason behind this is found within the empirical equations in which an increase in depth magnifies the strength where the increase in width only linearly increases strength. For example, a single 2×6 framing member which has an area of 7.875 square inches is equivalent to three 2×4 framing members which has an area of 15.75 square inches when it comes to strength against deflection.
It is also important to note that increasing in span lengths has a dramatic effect on the strength requirements of a framing member. For instance, to increase a span from 10’ to 12’, a 12% increase, the strength for deflection of the member needs to increase by 73%. This is due to the empirical equations that control strength. Therefore, as a Rule of Thumb, any increase in length should consider significant cost impacts to the design depth and cost.
The depth of a structural beam is influenced by the span as well as other variables such as spacing, loads, etc. Nonetheless, ratios can be used as a Rule of Thumb to provide guidelines. As a general “Rule of Thumb”, beam depths are in the range of ½” of depth for every foot of span or in other words, half the span but in inches. More specifically, the following two rules of thumb can be used:
Depth of Roof Beams, Roof Joists = 0.5 x Length
Depth of Floor Beams, Floor Joists = 0.6 x Length
This typically applies to sections 40’ in length or less.
Retaining Walls Rule of Thumb
The construction and location of retaining walls are very important in the stability of the soils that support a foundation. Too many failures occur in walls and adjacent structures from the improper placement or design of retaining walls.

As a “Rule of Thumb”, retaining walls should not be within a 1.5 to 1 ratio to the adjacent structure (height of wall compared to distance away from the structure). In addition, the soils should not be disturbed within a 1 to 1 ratio. In other words, a 6’ tall wall should be 9’ away from the nearest structure and the soils should not be disturbed within 6’ of the structure. Otherwise the soils may lose their stability and/or compaction and will not be able to support the designed loads. One exception to this rule is when the retaining walls are designed to withstand the additionally applied loads.
Shrinkage Cracks
There is an old saying that concrete will do two things, it will get hard and it will crack. Inevitably, almost all concrete will experience cracks for one reason or the other. One common occurrence of this is what is typically known as “Shrinkage” or “Curing” cracks. These are the small cracks that can be observed running in a relatively straight line across the foundation.

Shrinkage cracks start at the onset of cement hydration (curing). For the concrete to be workable enough to be placed, virtually all concrete is placed with twice as much water required to hydrate the cement. Because water evaporates from the upper surface of slabs on grade, uncombined water creates moisture differences between the top and bottom of the slab. Evaporation of moisture from the top surface of a slab causes the upper half of the slab to shrink more than the lower half (curling). This curling of the foundation induces cracks within the concrete. This is especially true when foundations are poured on warm days and / or windy conditions.
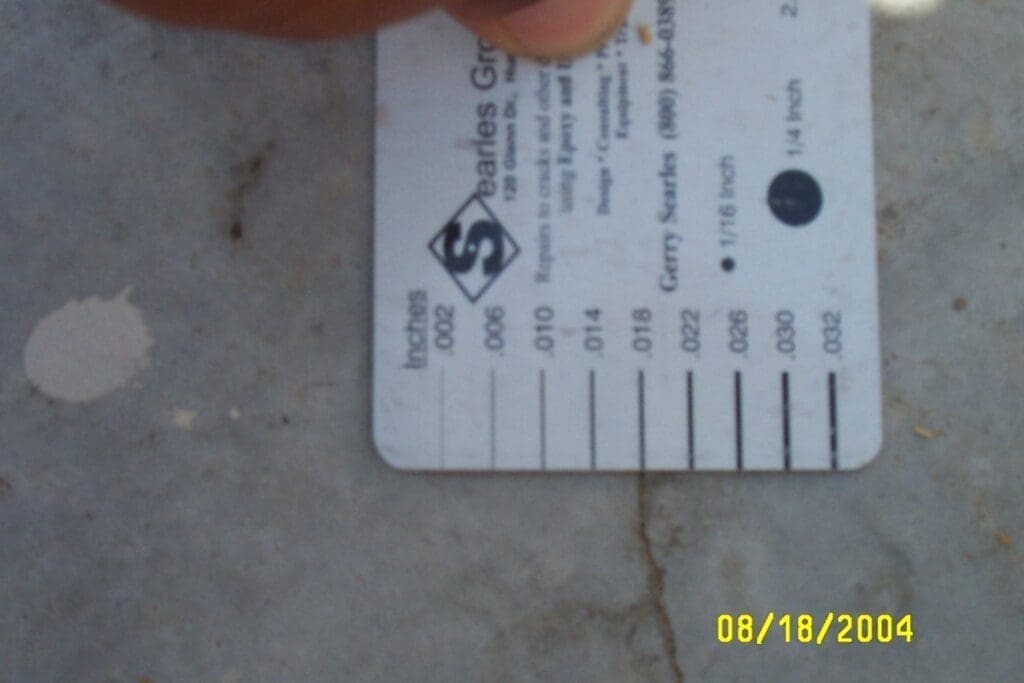
The cracks resultant from shrinkage can often run across the entire width of the foundation, and can be in excess of 1/32” in width. These are not a structural concern and generally do not impact the performance of the foundation. As a “Rule of Thumb”, never place hard tile type material directly over a shrinkage crack within a foundation as the tile will eventually crack due to minor vibrations within the foundation being isolated at the crack. Instead, use a mastic membrane over the shrinkage crack before setting tile/stone.
Shear Corner Cracks
Another common occurrence is a phenomenon called Shear Corner Cracks. These are the cracks that often occur at the corners of foundations and either have a vertical crack in the brick near the corners or that the corner of the concrete foundation has cracked at a 45 degree angle. These types of cracks are a common characteristic of concrete and brick is caused by thermal differentials between the concrete, brick and brick mortar. Typically, typically these cracks are not a structural concern.


Brick expands when it is hot and contracts when it is cold. To allow the brick to expand/contract, the mortar base on top of the foundation must not be allowed to bond to the foundation. This is typically performed through the use of a plastic membrane. The membrane is installed against the framing and lay on top of the foundation. The problem with this is the corners are often left exposed due to the lack of properly securing the loose ends of the membrane. When the plastic membrane does not reside under the brick (as required) the mortar will stick to the slab (at the corner) and under thermal load will create the cracks within the brick and mortar or within the corner of the foundation. More specifically, if the brick is installed under warmer conditions, then under cooler conditions the brick will contract and creates a vertical crack within the brick and mortar starting immediately where the plastic membrane stops.
On the contrary, if the brick is installed under cooler temperatures, then under warmer conditions the brick will expand and if the membrane is not in place, then the corner of the foundation will experience a crack starting at the end point of the membrane and typically run down at a 45 degree angle. Under thermal cycling, the cracks may occur in both the brick wall and the corner. The crack and concrete separations typically do not affect the structural integrity of the foundation.

Brick/Stone Expansion Joints
Expansion joints are required to separate brick walls into segments to prevent cracking mainly due to changes in temperature and moisture expansion. Since brick expands and contracts under thermal and moisture loading, joints must be placed within the wall to take this movement or distress will occur. Once the cracks occur, water may penetrate the cracks and agitate the cracks even further. Many times, this condition is misunderstood to be from foundation movement when in fact it is from thermal movements and from the lack of relief joints.


The joints are typically 3/8” to ½” in width and must be sealed to the brick to prevent water infiltration. The final determination of where to locate expansion joints depends on the color and type of brick and as well if and where windows and doors exist in the brick walls. But as a “Rule of Thumb”, expansion joints need to occur every 20’ on center for any uninterrupted walls in excess of 30 feet in length. Doors and windows create natural expansion joints so locating joints adjacent window/door frames is highly recommendable.
Finally, locating expansion joints near the corners is the most effective and will cut down on Shear Corner Cracks discussed above but is not the most aesthetically pleasing. Therefore most expansion joints occur within the first 20 feet of the corners.


These “Rules of Thumb” on their own will not in itself produce projects under the scenario of Good, Fast and Cheap. They only help cut down on some up front design issues as well as long term maintenance type issues in regards to a residential structure. Architects and engineers are and will continue to be challenged to provide high quality projects that are constructed on time and under budget but more attention to the “Rules of Thumb” may help reduce the stumbling blocks typically found within the industry.